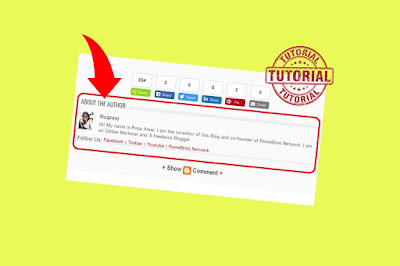
Add Author Box Automatically below blogger post
We have great collection of amazing looking video theme, You can download any theme you like for free. By using these themes, your blog is with an extraordinary feel of professionalism and style. Meanwhile continue reading Add Author Box Automatically below blogger post.
Read Also!
Google Blogs provide the best blogging experience where you can invite up to 100 Team members on your blog as Editor. Which means that your blog can be authored by 100 different people.
In order at atleast to give credit or to acknowledge the author of the blog post, it is good to display its Bio or information after his/her post.
For the Demo, you can also refer on the Author Bio below this post.
Now this tutorial will give you the idea on how to add author box automatically in below post.
How To Add Author Box Automatically?
Just simply follow the steps below:
Step #1: Log in to your Blogger Account and Go to your Blogger Dashboard
Step #2: Click ->Template -> Edit HTML Note: Backup your Template
Step #3: Find ]]></b:skin> by Pressing CTRL + F (Windows) or CMD + F (MAC)
Step #4: Now paste the below CSS code above/before ]]></b:skin>
Step #5: Now Search data:post.body
Step #6: Just below it paste the following code:
Change all necessary information with color RED and everything is set. Find Author name in Blogger Dashboard > Settings > Under permissions - Blog Authors.
That's all for this tutorials. To all visitors thank you for dropping by at vbt blog.
Happy Blogging!
In order at atleast to give credit or to acknowledge the author of the blog post, it is good to display its Bio or information after his/her post.
For the Demo, you can also refer on the Author Bio below this post.
Now this tutorial will give you the idea on how to add author box automatically in below post.
How To Add Author Box Automatically?
Just simply follow the steps below:
Step #1: Log in to your Blogger Account and Go to your Blogger Dashboard
Step #2: Click ->Template -> Edit HTML Note: Backup your Template
Step #3: Find ]]></b:skin> by Pressing CTRL + F (Windows) or CMD + F (MAC)
Step #4: Now paste the below CSS code above/before ]]></b:skin>
/* Author Box Code*/ .about-author {
width : 98%;
overflow : hidden;
margin:10px 0px;
border:0px;
}
.about-author img {
width:70px;
padding:3px;
border:1px solid #ddd;
margin:0px 5px 0px 0px;
}
.about-author h3{
font-family:verdana !important;
font-size:18px !important;
margin:9px 0px !important;
color:#666666 !important;
border-bottom:2px solid #666 !important;
border-top:0px !important;
}
.about-author p {
margin:0px;
text-align:justify;
color:#666;
}
Step #5: Now Search data:post.body
Step #6: Just below it paste the following code:
<b:if cond='data:blog.pageType == "item"'>Step #6: Save your template
<b:if cond='data:post.author == "AUTHOR NAME"'>
<div class='about-author'>
<h3>About Author:</h3>
<img align='left' src='IMAGE LINK OF AUTHOR'/>
<p>WRITE AUTHOR BIO HERE</p>
<p>Follow him @ <a href='BLOG LINK' target='_blank'>BLOG NAME</a> | <a href='TWITTER LINK' rel='nofollow' target='_blank'>Twitter</a> | <a href='FACEBOOK LINK' rel='nofollow' target='_blank'>Facebook</a></p>
</div>
</b:if></b:if>
Change all necessary information with color RED and everything is set. Find Author name in Blogger Dashboard > Settings > Under permissions - Blog Authors.
That's all for this tutorials. To all visitors thank you for dropping by at vbt blog.
Happy Blogging!


